11-07-2017, 01:03 PM
it really is nice work.
as you can see the guy building these knows a bit about welding!!
and
fabrication
new ideas
clean installs
simple effective designs
it's unfortunate that i can't credit him with the work but if you know him you know he's pretty private.

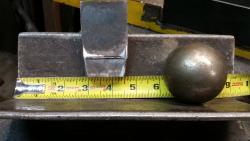
12 2 inch ball bearing and wedge tool
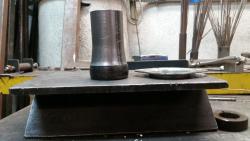
13 bearing outer race being test fitted to expanded pipe
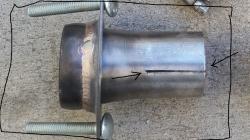
14 adjustable header detail blow up
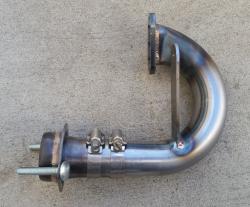
15 adjustable header detail fully closed.

16 adjustable header detail fully open.
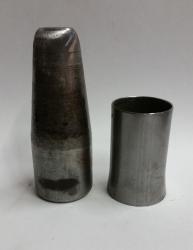
20 first jig 1 tapered to start flare in pipe.
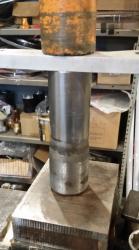
21 first jig 1 tapered to start flare in pipe set up in press.
22 jig 2 on left used in bottom of pipe when pressing ball bearing.
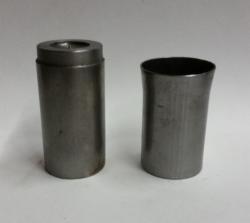
23 jig 2 placed in adapter pipe ready for pressing.

24 jig 2 in press with 2 inch ball bearing on top to flare out opening.

25 ball bearing fits in flared pipe nicely now.

26 jig 1 is tapered bigger near top.push in further to make flare in pipe longer.pix is jig set up in press with blocking underneath.

27 pipe now properly flared still sitting on jig 2.

Save
as you can see the guy building these knows a bit about welding!!
and
fabrication
new ideas
clean installs
simple effective designs
it's unfortunate that i can't credit him with the work but if you know him you know he's pretty private.

Quote:Hi David,
I still need to make one more sliding header section for my Mole FKE, so I will take some photos of the taper forming process. In the old days I used the sliding header parts from my Hornet on my Mole, since I had switched to FKE I with an open Mc91 and stock appearing light and heavy using my Saetta's. I modified the Mc header section to fit my Mole. In this case I have both karts, so I'll need 2 complete assemblies, minus the actual Mc header. On the Mole the shape of that part is different, so I didn't use the Hornet Mc header. I will include the pdf patterns for the swivel joint cone as well as the one sized to use a piece of tubing meant to accept a piece of vintage flex or straight pipe. I will email you a photo of my Marauder III with that pipe assembly in place. The photo was taken at the old Riverside International Raceway. I don't remember where I finished in that race, but I know I didn't win my class. I never won my f...ing class. By that time all I seemed to do was finish 2nd or dnf. In my mind I was happier leading and not finishing than ending up in second place.
12 2 inch ball bearing and wedge tool
13 bearing outer race being test fitted to expanded pipe
14 adjustable header detail blow up
15 adjustable header detail fully closed.
16 adjustable header detail fully open.
20 first jig 1 tapered to start flare in pipe.
21 first jig 1 tapered to start flare in pipe set up in press.
22 jig 2 on left used in bottom of pipe when pressing ball bearing.
23 jig 2 placed in adapter pipe ready for pressing.
24 jig 2 in press with 2 inch ball bearing on top to flare out opening.
25 ball bearing fits in flared pipe nicely now.
26 jig 1 is tapered bigger near top.push in further to make flare in pipe longer.pix is jig set up in press with blocking underneath.
27 pipe now properly flared still sitting on jig 2.
Save
Dave L.


